Blog from your iPhone / iPod

BlogPress is a nice free tool you can use to blog from your iPod/iPhone it self - if this appears on my blog - then it works :)

Manage your EC2 instances from your iPhone / iPod

I came accross this nice app for iPhone / iPod Touch - which helps you connecting to Amazon Cloud- and it's FREE.

Only weekness was - the way it accepts credentials - one way it's more convenient - but in other, you have to pass your credentias over the network in cleartext - and the app will store those internally.

Google Caffaine

Caffaine is the codename of the new, upgraded version of Google search engine.

This explains how it performs against the old one.


If you want to have an early look hear are the steps.


Adding DZone to iPhone / iPod Touch

I was looking for an aplication or an add-on to iPod/Safari where I could post a link to DZone - from the corresponding web site it self.

Failing to find one - I followed the following work-around - which worked perfectly for me - so, thought of sharng it for the benefit of others.

1. Open up Safari and go to http://www.dzone.com

2. Add a bookmark to it - and set the Title of the bookmark as - 'Submit to DZone'

3. Now - tap on the Bookmarks link, as in the image shown below - click 'Edit' and select 'Submit to DZone'.

4. Remove the current Address of the 'Submit to DZone' bookmark and set the following..
javascript:window.loaction='http://www.dzone.com/links/add.html?url='+escape(window.location)+'&title='+escape(document.title)+'&description='+escape(document.title)
5. Now - go to any web site you want - and to submit that link to DZone - just tap on the Bookmarks link on the bottom of the browser and select 'Submit to DZone'.

First look at Google Chrome OS

First we need to download the Chrome OS VMWare image from here.

To run this - we need to have VMWare Workstation - a 7 days trial version availbale from here to download.

Now - you need to wait hours and hours to get the trial version license key from VMWare. Instead of that use this - M142T-1034J-M8280-0KA8H-A49PC. If you are curious about this - here is the news behind that.

All set - setup your image with the VMWare Workstaion - steps here.


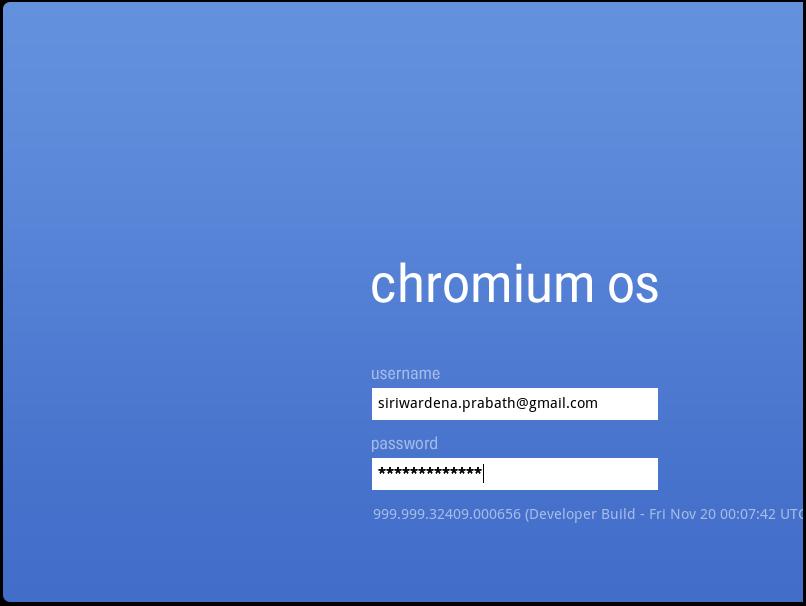
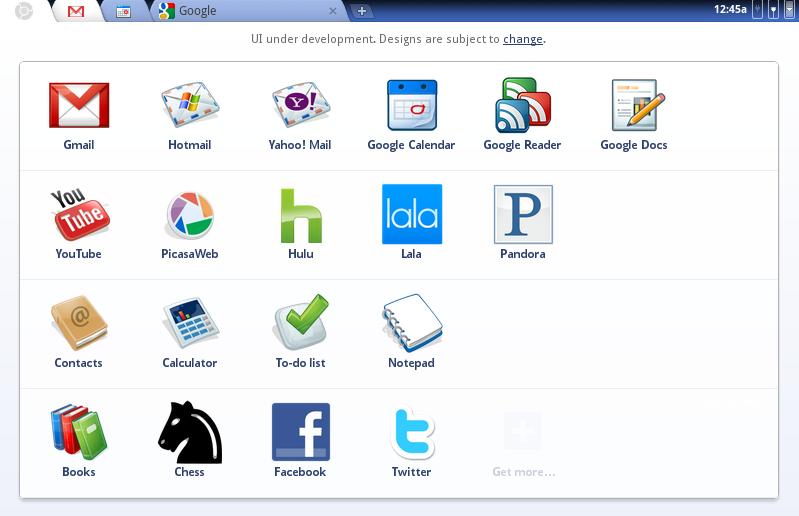
That's it - now you can login with your GMail account to your OS :)


Not bad at all - how about using an OpenID instead...

Read this for more info - "11 Things You Need to Know About Google's Chrome OS".

http://RampartFAQ.COM

We started with http://RampartFAQ.COM few months back as an effort towards helping the open source community around axis2/rampart. This post summarises all the posts there, as of now.


Basics
1.What is Rampart?
2.How to configure Rampart in Axis2?
3.How to run Rampart samples with Apache Tomcat?
4.How to enable SSL on Tomcat?
5.How does the nonce and the timestamp get generated for hashed passwords in UsernameToken?
6.How to create wildcard certificates with java keytool?
7.How to import/export certificates using Java keytool?

Intermediate
1.How to use Axis2 Dynamic Client to invoke Secured Web Services?
2.How password Callback Handlers work in Rampart?
3.How to ask for a hashed password in security policy?
4.How identity delegation works with ActAs in WS-Trust 1.4?
5.How SOAP message encryption works?
6.What is Assymetric Binding?
7.Would timestamp validation fail when servers and clients running in different timezones?
8.How to secure a web service with UsernameToken + HTTPS?
9.How to enable SSL on WAMP?
10.How to dump out JKS private key?
11.How to create a Certificate Authority with OpenSSL on Windows?
12.How to secure web services with HTTP Basic Authentication?
13.How to do UsernameToken authentication for web services based on AD?
14.How to secure a web service with UsernameToken?
15.Can we have multiple private keys in a single JKS?
16.<ramp:user> vs <ramp:encryptionUser> vs <ramp:userCertAlias>

Advance
1.How to call web services having SSL mutual authentication enabled?
2.How to setup a secure conversation with an STS?
3.How to ceate a new JKS with an existing private key and a signed certificate?
4.Can we have per service, policy based results validators?
5.How to apply policies at binding hierarchy?
6.Can we avoid duplicating crypto info added to RampartConfig in different services.xml files?
7.How to enable NTLM authentication in Axis2 client?
8.What are the Rampart handlers in inflow and what do they do?
9.How to do proxy authenticaion at runtime - in Axis2 client or stub?
10.What are policy subjects and where goes security policy assertions?
11.How Token referencing works in WS-Security?
12.How to add a secured and a non secured end point to the same service?
13.How to enable security for JAX-WS services with Axis2/Rampart?
14.How to generate a non-secured response to a secured request?

Common Errors
1.org.apache.axis2.AxisFault: First Element must contain the local name, Envelope , but found html
2.java.security.UnrecoverableKeyException: Cannot recover key
3.org.apache.ws.security.WSSecurityException: An unsupported signature or encryption algorithm was used
4.[ERROR] Referenced security token could not be retrieved (Reference "#CertId-238146")
5.java.security.NoSuchAlgorithmException: Cannot find any provider supporting RSA/NONE/OAEPPADDING
6.org.apache.axis2.phaseresolver.PhaseException: Did not find the desired phase 'Security' while deploying handler 'PolicyBasedSecurityOutHandler'
7.java.security.InvalidKeyException: Illegal key size or default parameters
8.org.apache.rampart.RampartException: The timestamp could not be validated

Integrating Novell eDirectory with WSO2 Identity Server

You can download an evaluation copy of Novell eDirectory from here.

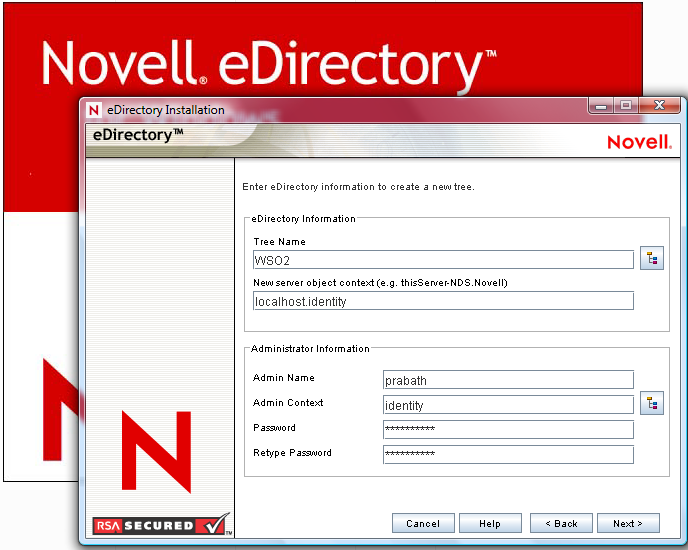
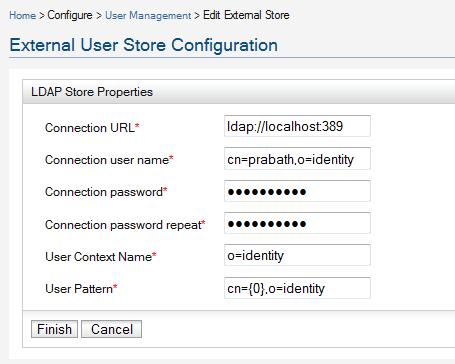
Then go through this blog post which explains - how to setup an LDAP based user store with Identity Server.


You need to follow exact the same steps - except - you need to have the settings from the above image while installing Novell eDirectory - for the Identity Server LDAP configuration as shown below.

Amazon CloudFront with Blogger blogs as a Content Delivery Network

Web sites like CNN, Yahoo and many more with high traffic use a Content Delivery Network like Akamai - so end users have to spend less time waiting for the web page to load on their screens.


Amazon CloudFront delivers the content using a global network of edge locations. Requests for your objects are automatically routed to the nearest edge location, so content is delivered with the best possible performance.

This blog post explains how to setup Amazon CloudFront with your blog.

First you need to have an Amazon account and signed up for an S3 bucket.

This explains everything you need to know - to set that up.

Now - you have an S3 bucket - say facilelogin.

Then - we need to sign up for a CloudFront account.

Go to http://aws.amazon.com/cloudfront and sign up with the same Amazon credentials you used before.

Now - sign in to the CloudFront management console.

Click the link - Create Distribution.

Set Origin as the S3 bucket you created earlier.

Give a child domain of your blog as the CNAME [e.g. cache.facilelogin.com]

This will create a CloudFront for the set S3 bucket.

Once you highlight the distribution you created - you can see it's details on the bottom panel.

Note down following.

Domain Name : d2npqrbnybq989.cloudfront.net
CNAME : cache.facilelogin.com

Now - you need to add a CNAME record to your domain.

I got my domain from Yahoo - so to add a CNAME record there, first sign in here, and a CNAME record to your domain with,

Source : cache.facilelogin.com [Value corresponding to the Amazon distribution CNAME]
Destination : d2npqrbnybq989.cloudfront.net [Value corresponding to the Amazon distribution Domain Name]

That's it - give some time to get your CNAME updated.

Now - add whatever content you want to - the Amazon S3 bucket and refer to content from you blog as http://cache.facilelogin.com/[resource name].

The image shown in the post is loaded from the S3 bucket - managed by Amazon CloudFront.

Hands on CLOUD while legs on EARTH

GlobeHands

1. Sign up for S3

Go to http://aws.amazon.com/s3/ and sign up for an Amazon S3 account.

Amazon S3 is storage on cloud.It provides a simple web services interface that can be used to store and retrieve any amount of data.

Read more on S3 from http://aws.amazon.com/s3/faqs/

2. Tools

Once you created the storage on cloud - there are tools which let you talk to the S3 iterface from your local computer.

CloudBerry Explorer is the one I use, it makes managing files in Amazon S3 storage EASY. By providing a user interface to Amazon S3 accounts, files, and buckets, CloudBerry lets you manage your files on cloud just as you would on your own local computer.

3. S3 with CloudBerry Explorer

Start CloudBerry Explorer --> File --> Amazon S3 Account --> New Account

Here you need to provide, an Access Key, a Secret Key and a Display. Make sure you tick the 'Use SSL' tick box.

To find your Access Key and the Secret Key - first you need to login to http://aws.amazon.com/account/ with your Amazon credentials and click on the link for 'Security Credentials'

Once you are there you can see both your Access Key ID and Secret Access Key listed under Access Keys.

Copy thoe keys from there and give those to CloudBerry Explorer.

Once you create the new account in CloudBerry Explorer - it will be listed under 'Source'.

Select your account from 'Source' - CloudBerry Explorer will talk to your S3 account and will display the buckets you created.

4. Buckets

Just like a bucket holds water, Amazon buckets are like a container for your files. You can name your buckets the way you like but it should be unique across the Amazon system.

To create a Bucket from CloudBerry - click the 'New Bucket' icon in blue on the top row.

Amazon S3 offers storage in the United States and in Europe (within the EU). You can specify where you want to store your data when you create your Amazon S3 buckets.

Keep in mind that the bucket namespace is shared by all users of the system. So the name you give needs to be unique accross the system.

Once you created the bucket - that will be displayed in the left pane of the CloudBerry Explorer.

Right click on the bucket and select 'Web URL' - that will show the web url to access your bucket [e.g. http://facilelogin.s3.amazonaws.com/]

Type that on a web browser and try to access it - you won't be.

Now you need to set the access control setting for your bucket.

Once again right click on the bucket and select ACL and then ACL Settings.

If yu want all the users to have read access to your bucket - then select 'All Users' and set 'Read' permission.

Now - try to access the link from the web browser.

To move data from your local machine to the S3 bucket in the cloud - just drag and drop the files from the right pane to the S3 bucket on the left pane.

5. Sign up for EC2

Amazon Elastic Compute Cloud (Amazon EC2) is a web service that provides resizable compute capacity in the cloud.

Just as Amazon Simple Storage Service (Amazon S3) enables storage in the cloud, Amazon EC2 enables “compute” in the cloud.

Go to http://aws.amazon.com/ec2/ and sign up for an EC2 acount. You can use same Amazon credentials you used to create the S3 accont.

Read more on EC2 from http://aws.amazon.com/ec2/faqs/

6. Amazon Management console

Now, go to htp://aws.amazon.com/console/ - select EC2 from right hand side combo box and 'Sign in to the AWS Console'.

The AWS Management Console gives you a quick, global picture of your cloud computing environment so that you can see what resources you’re operating and conveniently manage those resources

7. Starting an EC2 instance

Once you sign in to the Amazon Management console, you will see a dashboard.

To start using Amazon EC2 you will want to launch a virtual server, known as an Amazon EC2 instance.

Click on the link 'Launch Instances'.

Now - this will display a set of available AMI(Amazon Machine Image)s.

Select any AMI you want - I selected 'Basic Fedora Core 8'.

In the next screen - set the number of instances as - 1.

Select create new key pair.

Public/private key pairs allow you to securely connect to your instance after it launches. To create a key pair, enter a name and click Create & Download your Key Pair.

You will then be prompted to save the private key to your computer. Note, you only need to generate a key pair once — not each time you want to deploy an Amazon EC2 instance.

Let's also create a new security group - accept the default settings there only giving access to SSH port.

Security groups determine whether a network port is open or blocked on your instance(s).

Once you are done with all tha - you'll be back on the dashboard and under 'Instances' - you can see the instance you started now.

Click on that instance and you'll see all the details about it listed down - and copy the Public DNS value[e.g: ec2-75-101-193-101.compute-1.amazonaws.com]

Now - you have a Fedora instance running on the cloud.

Let's see how to login in to it from the local machine.

8. Putty

I am using Putty under Windows, to SSH in to my Fedora instance running on the cloud.

First we need to setup the private key with it. [Rember we download a key while launching the AMI].

Start Putty --> Session --> Set Host Name - the Public DNS of our running Fedora instance.

Go to Connection/SSH/Auth - set the private key file for authentication.

Here it requires the private key in PPK format - but what we downloaded is in PEM format.

Now we need to do a conversion - we can use puttygen for that.

Once done set the PPK file as the private key file for authentication in Putty.

Now, go to Connection/Data - set 'root' as the Auto-login user name.

Now - we are done - click on 'Open' to connect to your Fedora instance running on EC2.

9. Launching a Windows Instance

Hear we try to launch a Windows Instance and try to remote login in to it.

Before launching a Windows AMI - let's first create new Security Group.

From the main dashboard - you can select 'Security Groups' and then create a new secuirty group.

Once created - allow RDP connection for this security group - to allow windows remote login.

Now - in the same way we did before - launch a Windows AMI - but make sure you set it's security group - the one we just created with RDP connections allowed.

To get the Windows admin password to login through remote login - highlight the Windows instance from Dashboard/Instances - select Instance Actions/Windows Actions/Get Windows Admin Password.

Hashing alone is NOT a life saver

Hashing is a one way - irreversible algorithm which is used to store passwords in databases.

So - nobody other than you know what your actual password is.

When you create your password - your password will go through the hashing algorithm and the hashed password will be stored in the database.

When you try to login - you enter your password in clear text - then the application will calculate the hash of the entered password and will match that with the hashed password already stored in the database. If matches, you will let in.

How does this make your password safe?

Say somebody hacked in to the database.But - still he cant see your password in clear text. So - he can't login to your account. Hacker will only get access to the hashed password - but not to the password in clear text. Keep in mind - you can't never login with the hashed password. That is bacause - what ever you enter as the password will go through a hashing algorithm and that hashed value will be matched with hashed password in the database. In case if you enter the value you found from the database - which is actually the hashed password - then that will be rehashed by tha application and try to match with the hashed password from the database - which will obviously fail.

But - is this safe enough ?

The hacker who has access to your database can still replace your hashed password with a hash he caculated with a clear text known to him. Then he can login to your account with the clear text known to him - because it will be evaluated against the hash value he replaced in the database.

That is; hashing alone is never safe.

Whenever you store anything in clear text as a hashed value - you need to store it as a salted hash.

In cryptography, a salt comprises random bits that are used as one of the inputs to a key derivation function. The other input is usually a password or passphrase in clear text. Output is the 'salt' value. Now - the application will caculate the hash value of password in clear text + the salt value and store that in the database.

Application will also store the salt value - but for best security, the salt value should be kept secret, separate from the password database.

When a user enters his password for login - the application will retreive the salt value and caculate the hash over both the salt and the entered password - and will match the result with the hash value stored in the password database.

In case a hacker having access to the database replaces the user's password with a hash value of a clear text known to him - still the password verification will fail - bacause now the hash is not just caculated with the password along - it's from both the password and the salt value. In this case if the hacker wants to access user account he should be able to gain access to the database which stores hash values as well.

So - the bottom line is - hashing along is never secure - salted hashing much secure - but all that will make it's hard to break - but never stop from breaking fully.

Although you store clear text passwords as salted hashes - it's never an alternative to not to secure access to the database.

Interoperability Through Community


Secured SOA